Let’s cut to the chase: you’re probably here because you fish deeper lakes, not shallow farm ponds, and the whole sonar thing feels a little intimidating.
The good news? You don’t need to be a tech wizard or a tournament pro to make sense of it. You just need someone to break it down without talking like an instruction manual.
So here it is: a no-fluff, beginner-friendly guide to reading a fish finder, specifically tailored for deeper water. We’ll keep it practical, explain the stuff that actually matters, and help you start spotting fish like you’ve got X-ray vision.
What You’re Really Looking At
Let’s get one thing out of the way — fish finders don’t technically show fish. They show sonar returns: how sound waves bounce off objects underwater.
The unit turns those echoes into a visual image. That image tells a story, and you’ve got to learn how to read it.
Think of it like a fitness tracker for the lake. It’s giving you data, but the data only helps if you know what it means.
Anatomy of the Screen
When you fire up the unit, here’s what you’ll typically see:
- Water column: The vertical space in the middle or right side of your screen. That’s what’s directly under the boat.
- Depth reading: Usually displayed in the top corner. Pay attention to this, especially on deep lakes where fish suspend mid-water.
- Bottom: Shown as a thick band at the bottom of the screen. Hard bottoms are usually a bright, solid color or thick line. Soft bottoms look fuzzy or lighter.
- Arches or dots: Those are your targets. Sometimes fish look like a full arch. Sometimes just a blob. More on that in a second.
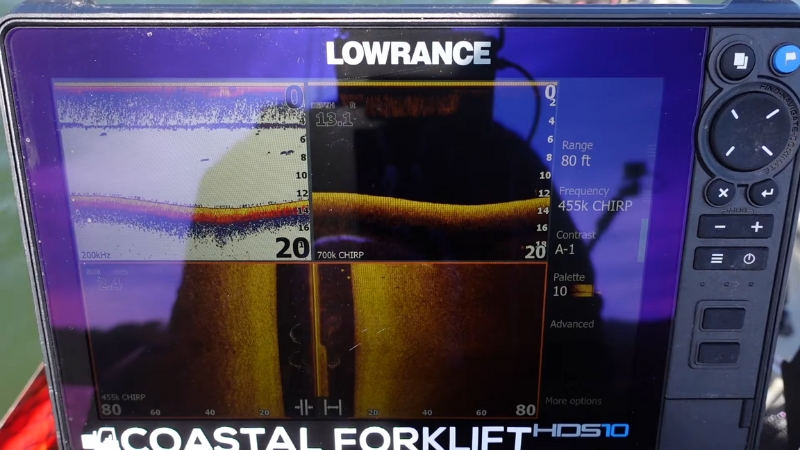
Quick Sidebar: 2D Sonar vs. Down Imaging vs. Side Imaging
There are a few different types of sonar, and they show the water a little differently.
Most beginners stick with 2D and Down Imaging. That’s smart. Start there. Now for the million-dollar question: How do you tell what’s a fish and what’s just… stuff? You’ve probably heard about the famous fish arch. It’s the most recognized sonar shape. Here’s what’s really happening: When a fish moves through the sonar cone, it reflects back a signal as it enters, gets strongest when it’s directly below, then weakens as it exits. That’s how the arch is formed. But here’s the kicker: Not every fish shows up as a full arch. Sometimes you’ll just see a half arch, a dot, or even a slightly brighter patch. Especially in deeper water, where sonar spreads wider and objects stay in the cone longer, things look a little different. The bottom isn’t just “down there.” It tells you a lot. In lakes with real depth, fish often hold at very specific layers — temperature, oxygen, bait — and the bottom helps you clue into those. Fish often relate to transitions, where hard meets soft. It’s like a fence line in a field: edges attract life. In deeper lakes, a mark that’s just off the bottom could be a fish. Look for separation — that tiny bit of space between the mark and the bottom. Even if it’s just an inch or two, that’s often enough to get your jig or drop shot noticed. Out of the box, most fish finders are in “auto” mode. That’s fine to start, but eventually you’ll want to tweak a few things. Let’s bring it all together. You’ve got the unit powered up, you’re sitting over 70 feet of water, and you’re wondering where to drop your line. Here’s how to get after it. In deep water, fish often suspend, not on the bottom, not at the surface, just hanging out mid-column. Your fish finder will show these as arches or blobs floating in the water column. Mark those targets and drop vertically, jigging spoons, blade baits, or drop shots are perfect for this. If you find baitfish, predators aren’t far. Look for clouds or clusters that move and pulse. These are usually shad or smelt schools. Bigger fish might show up just outside or underneath them. Anytime you mark fish or structure, hit “mark” or “waypoint.” It’s your breadcrumb trail. After a few trips, you’ll start to see patterns, where fish stage, how they move through the lake, and when certain areas turn on. Let’s keep it real — everyone fumbles early on. Save yourself the headache by avoiding a few rookie moves. Most fish finders offer a “fish ID” mode that turns returns into cartoon fish. Sounds helpful, right? Not really. It guesses, and often it guesses wrong. Turn that feature off and learn to read the raw data. If you’re trolling or drifting, your sonar screen changes. Marks might stretch or compress based on your speed. That’s normal, just make sure your chart speed is keeping up, and don’t assume a stretched-out blob is a monster fish. You don’t need to master every feature right away. Learn the basics: depth, structure, and fish returns. Get good at spotting bait, reading the bottom, and identifying active fish. The rest will come. Weird idea, but hear me out — go out just to scan. Bring your finder, no rods. Cruise the lake. Make notes. Watch how things change from shallow to deep. Check out humps, drop-offs, old creek beds. It’s like lifting weights with no pressure to PR, you’re just building muscle memory. Look, using a fish finder isn’t about staring at a screen all day, trying to decipher every flicker. It’s about improving your odds. It’s a tool, like a workout tracker or heart rate monitor. Once you learn what to look for, it becomes second nature. Start simple. Focus on: The more time you spend watching the screen and seeing what’s below you in real time, the more it’ll start to click. And when it does — when you drop down to a mark and feel that thump — you’ll know it was worth it. Fish finders don’t catch fish. You do. But they help, especially on those deeper lakes where guessing won’t cut it. You’ve already taken the first step. Now it’s about time on the water, a little trial and error, and getting to know your lake like the back of your hand. Ready to spot your first arch?
Type
Best For
Pros
What It Looks Like
2D Sonar
General use
Real-time feedback, arches
Color-coded blobs and arches
Down Imaging
Vertical precision
Clearer structure details
High-res grayscale slices
Side Imaging
Covering more area fast
Wide field of view
Like looking out from the boat
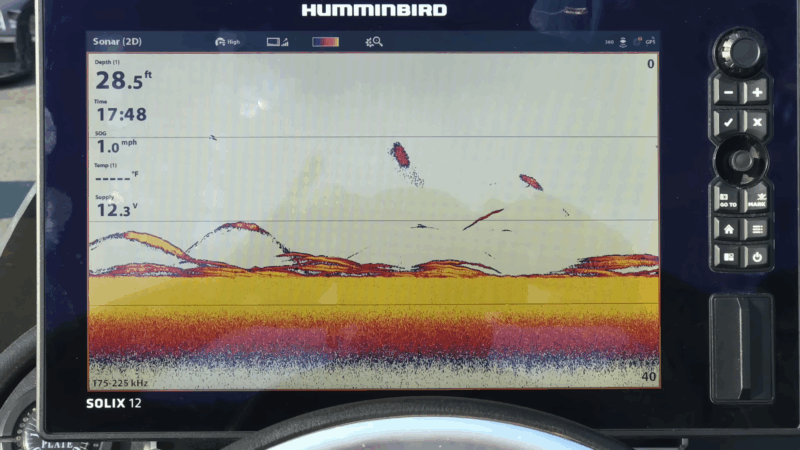
What Fish Actually Look Like
The Classic Arch
Factors That Affect What You See
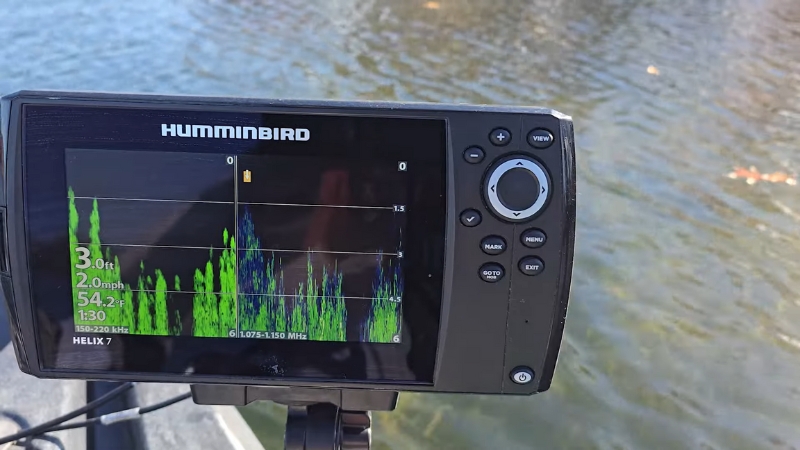
Reading the Bottom in Deep Water
Hard vs. Soft Bottom
Watch for Bottom Separation
Settings That Actually Matter
Key Settings to Adjust
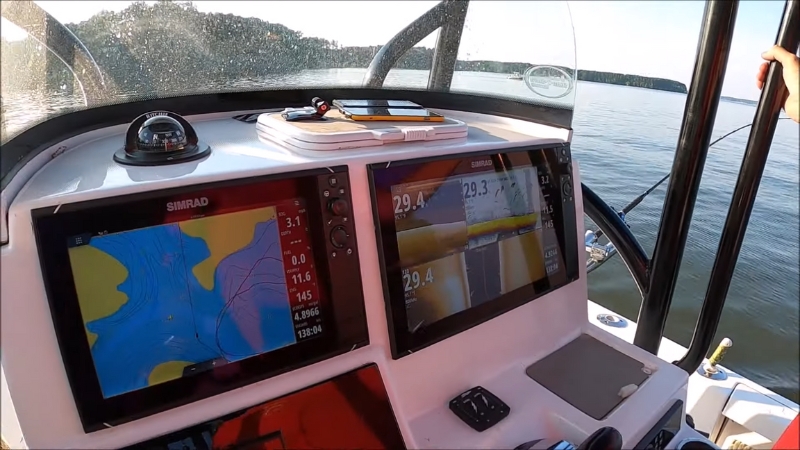
Practical Tips for Deep-Water Success
Look for Suspended Fish
Chase the Bait
Use Waypoints Like a Journal
Common Mistakes Beginners Make
Mistake #1: Trusting the Fish ID Icons
Mistake #2: Ignoring Boat Speed
Mistake #3: Getting Lost in the Menu
Bonus Tip: Practice Without Fishing
Final Thoughts: Don’t Overthink It
One Last Thing